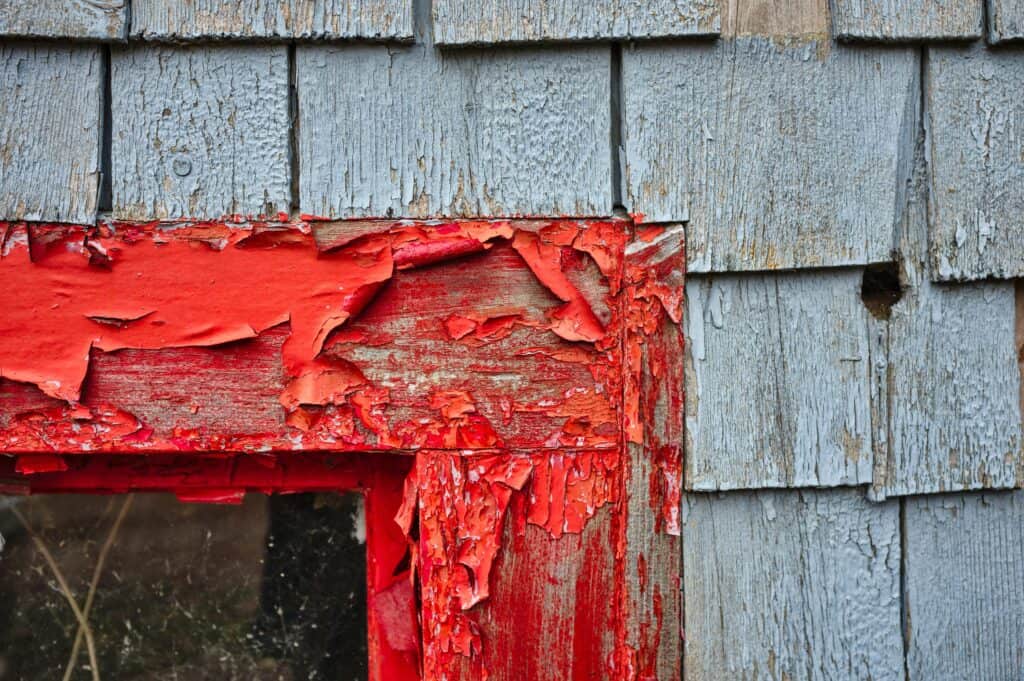
Poor paint adhesion is an insidious problem. In some cases, the paint will bubble right away. However, often times the issue doesn’t become evident until some time has passed. Adhesion issues are often observed during inspection or after a period of use, when defects such as bubbling or peeling become noticeable. You might finish the job, assuming everything is fine, only to get a call six months later from the homeowner complaining about bubbling, cracking paint and a ruined finish.
Why Does Poor Paint Adhesion Happen?
Poor paint adhesion can manifest in several ways, including cracks, flaking, peeling, and other forms of paint failure. For example, if a wall is not properly cleaned before painting, the paint may fail to adhere and begin peeling within months. These failures often occur when the paint film does not properly bond to the substrate, or when contaminants such as dirt, dust, grease, salt, mold, and other foreign matter are present on the surface. Moisture, humidity, and heat can be carried through the substrate, causing the paint film to deteriorate or become deteriorated, which leads to loss of adhesion and the need for repainting. Proper surface preparation—including sanding, priming, and the use of sealers and undercoats—is essential to ensure that paint adheres well to both new and previously painted surfaces, including interior and exterior walls.
Why is Adhesion Important?
It is important that surfaces are properly adhered before painting to prevent future adhesion issues. The binder and resin in the paint act as a glue, forming a strong bond and durable film; if the paint is too soft or improperly formulated, adhesion problems can result. Walls, especially drywall or plastered wall surfaces, should be thoroughly prepared and coated with primer and paint to ensure optimal adhesion.
For best results, the wall should be coated evenly, and the use of an appropriate undercoat is critical for long-term performance. For this reason, when considering which exterior trim products to use, it is crucial to choose products with high quality paint, that are also properly preservative treated. Additionally, the ends of the boards should be properly sprayed with a special end spray paint to help eliminate splitting boards. Spraying is an effective application method to achieve even coverage and good adhesion, especially on smooth surfaces.
As the saying goes, an ounce of prevention is worth a pound of cure. Making sure your choosing high quality trim products where paint adheres properly will save you the cost of having to scrape and repaint at some point in the future.
Considering Trim Materials
Vinyl Trim is Temperature Sensitive
Exterior vinyl trim is a difficult material to paint. The product expands and contracts quite a bit due to changes in temperature across the seasons. In addition to temperature fluctuations, heat and humidity can further impact the vinyl substrate. This, in turn, increases the risk of adhesion loss, splitting, and peeling of the paint from the trim’s surface. Unless an expensive, resilient, premium paint product is used, these environmental factors will eventually cause the paint to lose adhesion, split, and peel away from the trim’s surface. Depending on the local climate it still may not be fully effective. For this reason, vinyl trim may not be the best option for exterior painted trim.
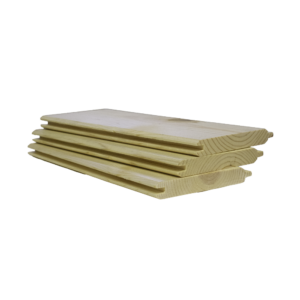
Avoid Low-Quality Wood Trim
Preservative-treated, primed wood trim is an excellent choice for exterior applications, but purchasing a lower-quality product can cause problems. Manufacturers of cheap wood trim save money where they can, and that often translates to a thin, patchy primer application.
Good primer coverage is critical on raw wood for proper paint adhesion. Applying multiple coats and ensuring proper layers help build a strong paint film that adheres well to the wood substrate, improving the bond between each layer and enhancing durability. If your trim doesn’t have a thick enough coating to fully seal the wood, or if the coverage is incomplete leaving the trim mostly bare in spots, you’ll almost certainly wind up with a ruined paint finish.
You can fix this by applying your own primer first before painting, but that’s an extra step that increases the cost and length of the project. It’s better to spend the extra money to purchase high-quality treated exterior trim like that produced by Belco Forest Products. Our trim features six mils of premium latex primer evenly distributed across the surface to guarantee strong top-coat adhesion. Starting with better materials doesn’t cost more upfront, but the time and money saved by avoiding messy and expensive fixes necessitated by poor paint adhesion will more truly save time and money in the long run. Inadequate primer or paint application can lead to failures in the paint film, requiring repainting to restore proper adhesion and appearance. Not more money, just better product.
Don’t Mix Oil and Latex Paints and Primers
To get the best results you should always match your paint and primer. If you’re using a latex-based exterior paint, then you should use a latex primer. An oil-based paint should be paired with an oil-based primer. This is critical to guarantee proper adhesion. Proper priming, including the use of undercoats and sealers, helps create a stable foundation for subsequent layers of paint. This ensures each layer bonds well and provides long-lasting protection.
Latex paint can be applied directly over oil-based paint as long as the surface is properly roughed and cleaned first. Sanding is an important step to ensure the new paint layer adheres well by dulling glossy surfaces and creating a mechanical key. However, you also should never apply an oil-based paint over latex paint without first applying a good quality oil-based primer. Oil-based paint is much stiffer than latex when it dries. If you paint it directly over latex it creates a hard shell which can crack when the more flexible latex below shifts.
Painting Previously Painted Surfaces
When tackling a project that involves painting previously painted surfaces, it’s crucial to recognize that these jobs come with their own set of challenges. Poor adhesion is a common issue. It often stemming from poor surface preparation or incompatibility between the new paint and the existing paint film. If the surface isn’t properly prepared, you may encounter paint failure in the form of peeling, flaking, or bubbling. Unfortunately, these problems can quickly undermine the look and longevity of your work.
Assessment
Start by thoroughly assessing the condition of the existing paint film and substrate. Look for signs of deterioration, such as cracks, peeling, or areas where the paint has already begun to lose adhesion. Any foreign matter—like dirt, dust, grease, or mold—must be completely removed. Washing the surface and allowing it to dry fully is essential. Lingering moisture can cause the new paint to lose adhesion or even lead to blistering and flaking down the line.
Sanding
Sanding is another key step. By lightly sanding the surface, you not only remove contaminants but also create a slightly roughened texture that helps the new coat of paint bond more effectively. For surfaces with stubborn stains or glossy finishes, sanding is especially important to ensure proper adhesion.
Primer
Choosing the right primer is also vital. Pick a high-quality latex primer or oil-based primer, selected based on the type of paint you plan to use. This can help bridge the gap between the old and new layers. It will also promote a strong bond and reducing the risk of adhesion problems. If you’re unsure about compatibility, perform a simple adhesion test. Just apply a small patch of your chosen paint, let it dry, and then check if it peels or lifts when gently scraped. This quick test can save you from a costly paint failure later.
Environmental Considerations
Environmental conditions play a significant role as well. High humidity, heat, or moisture can cause the paint film to deteriorate or fail to adhere properly. Always check the weather forecast and aim to paint when conditions are optimal. Dry, moderate temperatures with low humidity are best. If moisture is a concern, consider applying a sealer or moisture-resistant paint to protect your project.
Painting Consultation & Next Steps
If you’re ever uncertain about the best approach for your specific surfaces, don’t hesitate to consult a professional contractor or your local paint supplier. Their expertise can help you avoid common pitfalls and ensure your painting project results in a durable, beautiful finish.
By following these steps—thorough cleaning, careful sanding, proper priming, and mindful paint selection—you’ll greatly reduce the risk of poor adhesion. Plus, you’ll enjoy a long-lasting, professional-looking result on your previously painted surfaces.