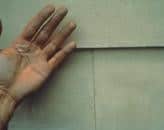
Repainting to fix the paint problems on exterior trim of your home will revitalize its curb appeal. The best way to have an excellent result is to prepare the surface right. This list will help you diagnose paint problems, causes, and solutions for your project.
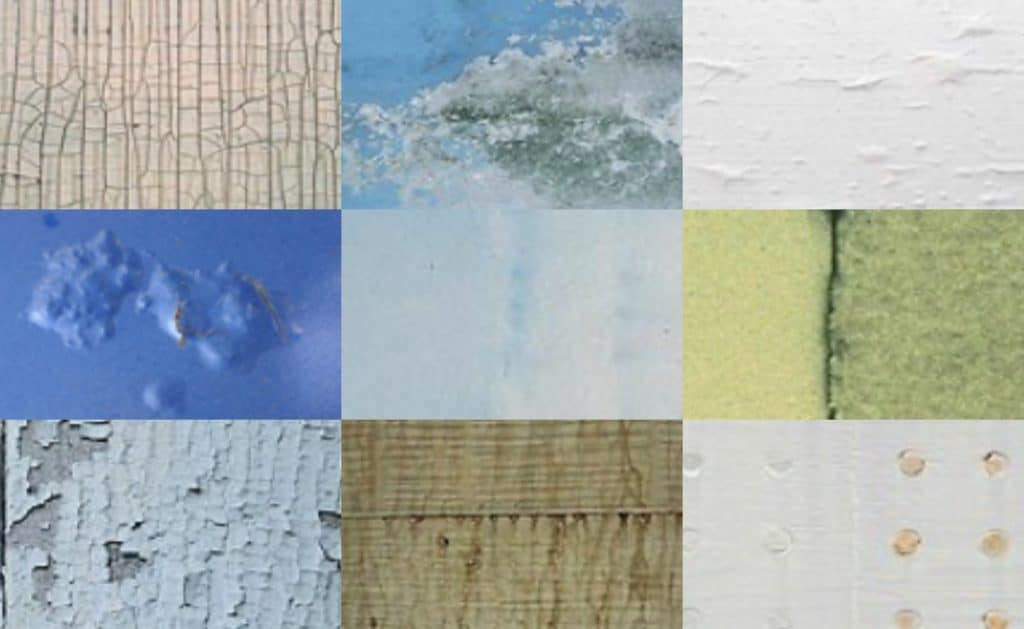
1-Cracking / Flaking

Paint Problem
- Use of a lower quality paint that has inadequate adhesion and flexibility.
- Over thinning the paint or spreading it too thin.
- Poor surface preparation, especially when the paint is applied to bare wood.
Solution
The best way to avoid this paint problem on exterior trim is to prepare the surface correctly. It may be possible to correct cracking that does not go down to the substrate by removing the loose or flaking paint with a scraper or wire brush, sanding to feather the edges, priming any bare spots and repainting. If the cracking goes down to the substrate remove all of the paint by scraping, sanding and/or use of a heat gun; then prime and repaint with a
quality exterior latex paint.
This link will offer other insights into paint problems. https://belcofp.com/paint-adhesion-why-is-my-topcoat-coming-off/
2-Alligatoring
Paint Problem
- Application of an extremely hard, rigid coating, like a solvent-based enamel, over a more flexible coating, like a water-based primer.
- Application of a topcoat before the undercoat is dry.
- Natural aging of oil-based paints as temperatures fluctuate. The constant expansion and contraction results in a loss of paint film elasticity.
Solution
Old paint should be completely removed by scraping and sanding the surface; a heat gun can be used to speed work on large surfaces, but take care to avoid igniting paint or substrate. The surface should be primed with a high quality water-based primer, then painted with a top quality exterior water-based paint.
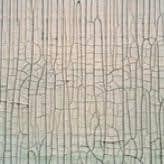
3-Blistering

Paint Problem
- Painting a warm surface in direct sunlight.
- Application of oil-based or alkyd paint over a damp or wet surface.
- Moisture escaping through the exterior walls (less likely with latex paint than with oil-based or alkyd paint).
- Exposure of latex paint film to dew, high humidity or rain shortly after paint has dried, especially if there was inadequate surface preparation.
Solution
If blisters go down to the substrate, first try to remove the source of moisture. Remove blisters by scraping, then sanding the surface. Prime any bare timber with a high quality water-based primer, and repaint with a high quality water-based exterior paint.
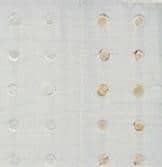
4 – Efflorescence/Mottling
Paint Problem
- Failure to adequately prepare surface by removing all previous efflorescence.
- Excess moisture escaping through the exterior masonry walls from the inside.
Solution
If excess moisture is the cause, eliminate the source by repairing the roof, cleaning out gutters and downspouts, and sealing any cracks in the masonry with a high quality, water-based all-acrylic caulk. If moist air is originating inside the building, consider installing vents or exhaust fans,
especially in kitchen, bathroom and laundry areas. Remove the efflorescence and all other loose material with a wire brush, power brush or power washer; then thoroughly rinse the surface. Apply a quality water based or solvent-based masonry sealer and allow it to dry completely; then apply a coat of top quality exterior house paint, masonry paint or
elastomeric wall coating.
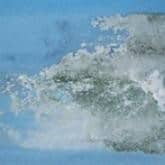
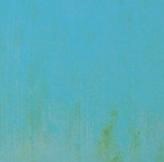
5-Mold
Paint Problem
- Forms most often on areas that tend to be damp, and receive little or no direct sunlight (the underside of eaves are particularly vulnerable).
- Working with a lower quality paint.
- Preparation procedures as for new construction.
Solution
Test to distinguish mildew from dirt by applying a few drops
of household bleach to the discolored area; if it disappears, it
is probably mildew. Treat the mildew by applying a mixture of
water and bleach, 3:1, and leave on for 20 minutes, applying
more as it dries. Wear goggles and rubber gloves. Then scrub
and rinse the area. Apply an exterior latex primer, then a
top-of- the-line exterior latex paint in flat, satin, semigloss or
gloss finish, depending on the desired appearance.
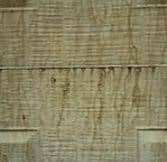
6-Chalking
can cause color fading. Although some degree of chalking is a normal, desirable way for a paint film to wear, excessive film erosion can result in heavy chalking.
Paint Problem
- Using interior paint outdoors.
- Use of a lower quality paint.
- Painting with solvent-based paint in direct sunlight areas.
Solution
First, remove as much of the chalk residue as possible, scrubbing with a stiff bristle brush (or wire brush on masonry) and then rinse thoroughly; or use power washing equipment. Check for any remaining chalk by running a hand over the surface after it dries. If noticeable chalk is still present, apply a quality oil-based or acrylic latex primer (or comparable sealer for masonry), then repaint with a quality exterior coating; if little or no chalk remains and the old paint is sound, no priming is necessary.
7-Surfactant Leaching
Paint Problem
- Painting in cool, humid conditions or just before they occur. The longer drying time allows the paint’s water-soluble ingredients — which would normally evaporate, or be leached out by rain or dew — to rise to the surface before paint thoroughly dries.
- Mist, dew or other moisture drying on the painted surface shortly after it has dried. Be aware of coming weather issues to avoid this paint problem on exterior trim.
Solution
Avoid painting in the late afternoon if cool, damp conditions are expected in the evening or overnight. If the problem occurs in the first day or so after the paint is applied, the water-soluble material can sometimes be rinsed off rather easily. Fortunately, even more stubborn cases will generally weather off in a month or so. Surfactant leaching should not affect the ultimate durability of the coating.
8-Wrinkling
Paint Problem
- Paint applied too thickly (more likely when using solventbased paints).
- Painting a hot surface or in very hot weather. This paint problem on exterior trim can easily be avoided.
- Exposure of uncured paint to rain, dew, fog or high humidity levels.
- Applying the topcoat to insufficiently dried first coat.
- Painting over contaminated surface (e.g., dirt or wax).
Solution
Scrape or sand substrate to remove wrinkled coating. Repaint, applying an even coat of top quality exterior paint.
9-Dirt Pickup
Paint Problem
- Use of low quality paint.
- Soil splashing onto the substrate.
- Air pollution, car exhaust and flying dust collecting on house body and horizontal trim
Solution
Wash off all surface dirt before priming and painting. If unsure whether the problem is dirt or mildew, conduct a simple spot-test (see Mildew). Clean off dirt with a scrub brush and detergent solution, followed by a thorough rinsing with a garden hose. Heavier dirt accumulations may require the use of a power washer. (Higher gloss paints are more resistant to dirt pickup than flat paints, which are more porous and can more easily entrap dirt.
10-Fading/Poor Color Retention
Paint Problem
- Painting with an interior grade of paint for an outdoor application.
- Use of lower quality paint, leading to rapid degradation (chalking) of the paint film.
- Applying a paint color that is particularly vulnerable to UV radiation (most notably certain bright reds, blues, and yellows).
- Tinting a white paint not intended for tinting, or over tinting a light or medium paint base.
Solution
When fading/poor color retention is a result of chalking, it is necessary to remove as much of the chalk as possible (see Chalking). In repainting, be sure to use a quality exterior house paint in colors recommended for exterior use.
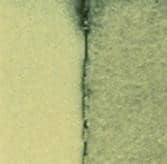
Bonus-Lapping
Paint Problem
- Failure to maintain a ‘wet edge’ when applying paint. Most importantly avoid this paint problem on exterior trim by using the suggestions below.
Solution
Maintain a wet edge when painting by applying paint toward the unpainted area and then back into the just painted surface. In addition, this technique (brushing from “wet to dry” rather than vice versa) will produce a smooth uniform appearance.
It is also wise to minimize the area being painted, and plan for interruptions at a natural break, such as a window, door or corner (especially important when applying stain to bare wood). Consequently, alkyd paints generally have superior wet edge properties.
Bonus-Nail Head Rusting
Paint Problem
- Non-galvanized iron nails have begun to rust, causing bleed-through to the top coat.
- Non-galvanized iron nails have not been countersunk and filled over.
- Galvanized nail heads have begun to rust after sanding or excessive weathering.
Solution
When painting new exterior construction where non-galvanized nails have been used, it is advisable to first countersink the nail heads. Most importantly then caulk them with a top quality, water-based all-acrylic or siliconized acrylic caulk.
Each nail head area should be spot primed, then painted with a quality latex coating. When repainting exteriors where nail head rusting has occurred, wash off rust stains, sand the nail heads, then follow the same surface preparation procedures as for new construction.
Bonus-Poor Alkali Resistance
Paint Problem
- Coating was applied to new masonry that has not cured for a full year.
- Fresh masonry is likely to contain lime, which is very alkaline. Until the lime has a chance to react with carbon dioxide from the air, the alkalinity of the masonry remains so high that it can attack the integrity of the paint film.
Solution
Allow masonry surfaces to cure for at least 30 days, and ideally for a full year, before painting. If this is not possible, apply a quality, alkali-resistant sealer or water-based primer, followed by a top quality 100 percent acrylic exterior paint. The acrylic binder in these paints resists alkali attack.
Bonus-Tannin Staining
Paint Problem
- Failure to adequately prime will cause this paint problem on exterior trim. In other words , seal the surface before applying the paint
- Use of a primer that is not sufficiently stain-resistant. That is to say, be aware to use tannin blocking top coating with cedar or redwood.
- Excess moisture escaping through the exterior walls, which can carry the stain to the paint surface.
Solution
Correct any possible sources of excess moisture (see Efflorescence and Mottling). After thoroughly cleaning the surface, apply a high quality stain- resistant oil-based or acrylic latex primer. Oil-based stain-resistant primers are the best type to use on severely staining boards. In extreme cases, a second coat of primer can be applied after the first has died thoroughly. Finish with a top quality latex paint.