
Exterior wood trim fails for one reason: it wasn’t treated as a system. For builders and installers, trim isn’t a finishing detail; it’s a performance component. Get the maintenance strategy right from installation, and you help eliminate callbacks, reduce warranty claims, and protect the structure in the long term.
Understanding Lifecycle Performance in Exterior Wood Trim
Exterior wood trim doesn’t degrade all at once; it breaks down gradually, under constant exposure to moisture, sunlight and temperature swings. Coatings go first. Then, if maintenance is neglected, the wood itself follows.
For builders, thinking in terms of lifecycle performance means controlling that outcome before it starts. That means selecting the right materials, following sound installation practices and setting clear expectations for ongoing maintenance — not leaving those decisions to chance or the next owner.
Why Lifecycle Thinking Matters
Taking a lifecycle approach is the easiest way to reduce long-term risk. Instead of reacting to failures, builders can prevent them through better planning and execution. This leads to more consistent results across projects.
It also improves client satisfaction. When trim performs well over time, it reflects positively on both the builder and installer, strengthening reputation and trust.
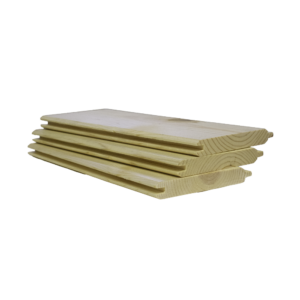
Pre-Installation Standards That Impact Maintenance
Maintenance problems often start before the first board is nailed. How trim is stored and handled on-site directly affects how it performs later. Materials that absorb moisture in the staging area will shrink and move after installation, opening gaps, breaking seals and accelerating coating failure.
Proper Storage and Handling
Trim should be kept dry, off the ground and protected from direct weather exposure. Leaving materials exposed can lead to moisture absorption, which creates long-term instability once installed.
Allowing the trim to acclimate for at least 72 hours also helps minimize movement. This step is often overlooked but plays an essential role in long-term performance.
Moisture Control Before Installation
Installing trim over damp substrates can trap moisture behind the material. Over time, this leads to coating breakdown and potential decay. A dry and stable installation surface ensures that the trim starts its lifecycle in the best possible condition, reducing the likelihood of early maintenance issues.
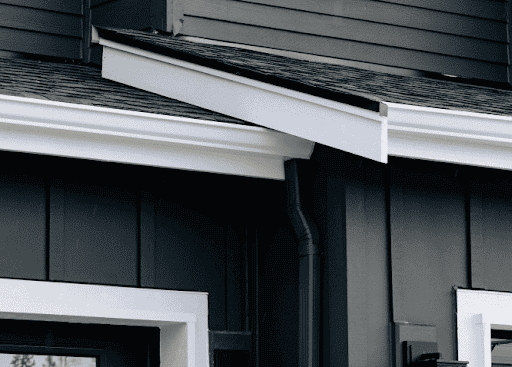
Installation Practices That Reduce Maintenance
Installation is one of the most important phases in determining how often exterior wood trim will need maintenance. Small oversights can lead to frequent repairs and premature failure.
Clearance and Spacing Considerations
Proper clearances help keep trim away from moisture sources. Elevating trim above grade and separating it from horizontal surfaces reduces water exposure. These simple spacing decisions significantly extend the lifespan of the trim by preventing constant moisture contact.
Sealing and Fastening Techniques
Small installation details have a great impact on durability. Every field cut exposes untreated wood and must be sealed immediately. Unsealed cuts are open invitations for moisture. Corrosion-resistant fasteners are equally non-negotiable, preventing the staining and structural damage that show up long after the crew has left.

Coating Systems and Maintenance Cycles
Coatings act as the primary barrier between wood trim and the environment. Without proper coating, even high-quality trim will deteriorate quickly.
Initial Coating Application
Trim should be coated as soon as possible after installation. All surfaces, including edges and cut ends, need to be sealed to prevent moisture intrusion. A complete coating system ensures that the trim is fully protected from environmental exposure right from the start.
Repaint and Maintenance Timing
Coatings naturally wear down over time due to sunlight and weather. Repainting should be done before visible failure occurs to maintain protection. Regular repaint cycles help preserve both the appearance and structural integrity of the trim, especially in areas with high exposure.
Routine Maintenance Standards for Exterior Wood Trim
Routine maintenance helps preserve both the structure and the finish of exterior wood trim. It’s not complicated, but it must be consistent.
Cleaning and Surface Care
Cleaning removes dirt, mildew and buildup that can trap moisture. A simple wash using mild detergent is usually enough to maintain the surface. Keeping the trim clean helps extend the life of the coating and reduces the risk of moisture-related issues.
Inspection and Early Detection
Regular inspections allow for early identification of potential problems. Addressing small issues early prevents more costly repairs later.
Key maintenance checks include:
- Peeling, cracking or fading paint
- Gaps in joints or failed caulking
- Signs of moisture intrusion or discoloration
Material Selection and Its Impact on Maintenance
Material choice has a direct impact on how often maintenance is required. Not all wood trim products perform the same under exposure.
Benefits of Preservative-Treated Trim
Preservative-treated wood trim offers added resistance to decay, insects and moisture. This improves long-term durability and reduces maintenance frequency. It also provides a more stable surface for coatings, helping paint systems last longer and perform better.
Long-Term Cost Considerations
While some premium materials may cost more upfront, they often reduce overall lifecycle costs. Fewer repairs, less frequent repainting and longer service life all contribute to better value over time.
Builders who prioritize performance materials often see fewer callbacks and improved project outcomes.
Common Failure Points and How to Prevent Them
Most failures in exterior wood trim come from preventable issues rather than material defects. Understanding these risks helps builders avoid them.
Moisture-Related Failures
Moisture is the leading cause of trim deterioration. Poor clearances, lack of sealing or trapped water can all lead to long-term damage. Preventing moisture exposure is the most effective way to extend the life of wood trim.
Coating and Maintenance Gaps
Delaying repainting or ignoring early signs of coating wear exposes the wood to the elements. Once the protective layer fails, deterioration accelerates quickly.
Common causes of trim failure include:
- Inadequate sealing of cut ends and joints
- Improper clearances from grade or horizontal surfaces
- Delayed repainting and coating maintenance
Setting Maintenance Expectations with Clients
Builders and installers play a key role in setting expectations for exterior wood trim maintenance. Many long-term issues stem from a lack of awareness rather than poor installation.
Educating Property Owners
Providing clear maintenance guidance helps property owners understand what’s required to keep their trim in good condition. This includes cleaning, inspections and repainting timelines. When owners know what to expect, they’re more likely to follow through with proper maintenance.
Protecting Long-Term Performance
Setting expectations early helps ensure that trim continues to perform as intended. It also reduces the likelihood of disputes or misunderstandings down the line. A well-informed client is more likely to maintain the property properly, protecting both the structure and the builder’s reputation.
The Lifecycle Advantage Starts at the Lumberyard
Exterior wood trim performance depends on more than just installation. It’s shaped by every decision before and after — how materials are stored, how cuts are sealed, how substrates are prepped and how maintenance expectations are set from day one.
Builders and installers who treat trim as a lifecycle system, not just a finish detail, see the results: fewer callbacks, longer service life and better outcomes for everyone down the chain.
Don’t leave trim performance to chance. Contact Belco Forest Products to learn how our preservative-treated trim solutions support reliable, low-maintenance exterior wood trim systems built to last.