We all know that excellent roofing systems create exterior visual statements and vital structural protection. Beyond the shingles, tiles, or panels lie carefully chosen materials, systematically installed to ensure resilience against various weather conditions. Drip edge holds significant importance in this system. Its proper functioning is crucial in order to avoid roof replacement just a few years after initial installation. Here, we delineate between variations of drip edge types, styles, and installation standards.
Roof Drip Edge 101
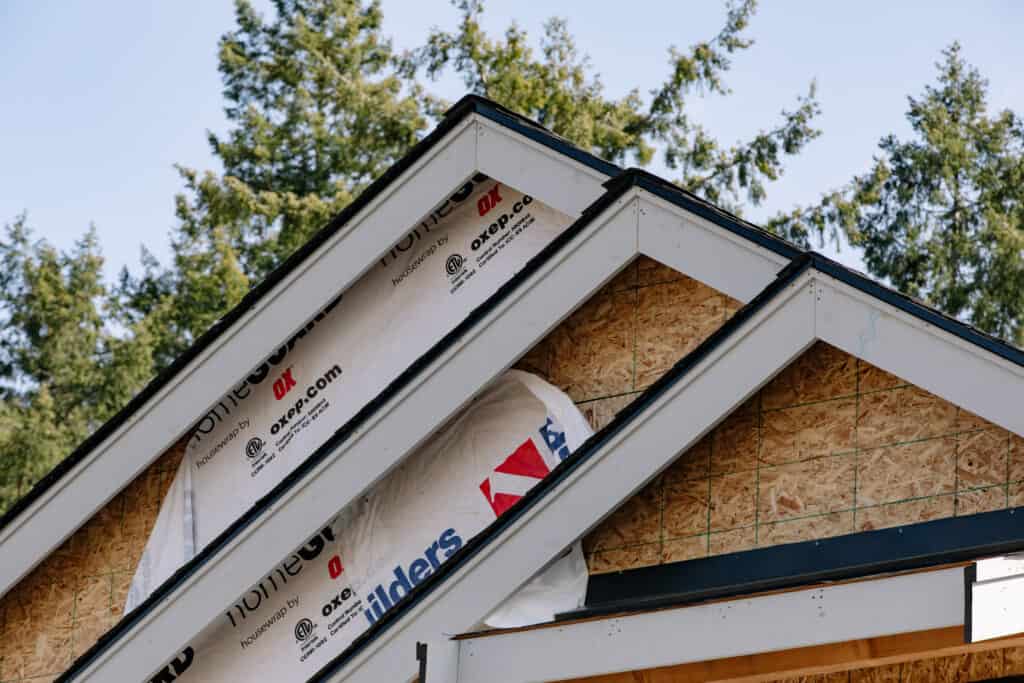
If you’re a builder, contractor or savvy homeowner, you likely understand the importance of drip edge installation. For those who simply don’t know, a drip edge is an angled piece of flashing positioned at the roof’s edge. It attaches to the roof deck and extends over fascia boards (the horizontal boards situated beneath the eaves). Typically it is installed before underlayment, shingles, or other roofing materials. In some cases, retrofitting a drip edge to an existing roof is necessary. However, modern building codes (ref: ICC) generally mandate the inclusion of a drip edge. There are plenty of exceptions to code mandates on drip edge installation, but as a general rule it’s recommended, if not required.
The Functional Significance of Roof Drip Edge
The primary function of a roof drip edge is to prevent moisture from infiltrating beneath the row of shingles closest to the roof’s eaves. This channels water away from the fascia into the gutter. Without a drip edge, precipitation can seep behind the gutters, running down the fascia into the soffit boards. This results in water damage to wooden structures and roofing underlayments, negatively impacting the roof’s lifespan. In severe cases, water may infiltrate the attic or walls, causing internal damage.
Additionally, properly installed drip edge provides protection against adverse weather conditions. Winds can force precipitation under the lowest row of shingles which can damage and even loosen shingles. Effective water flow is also imperative to prevent the formation of ice dams during winter months. Plus, sealing the gap between the roof edge and fascia prevents insects and pests from establishing annoying and potentially damaging habitats.
Roof Drip Edge Types & Profiles
Drip edge comes in various shapes, or profiles. Choosing the best type depends on a few factors, cost, climate, and roof style and material compatibility. These are the most common types:
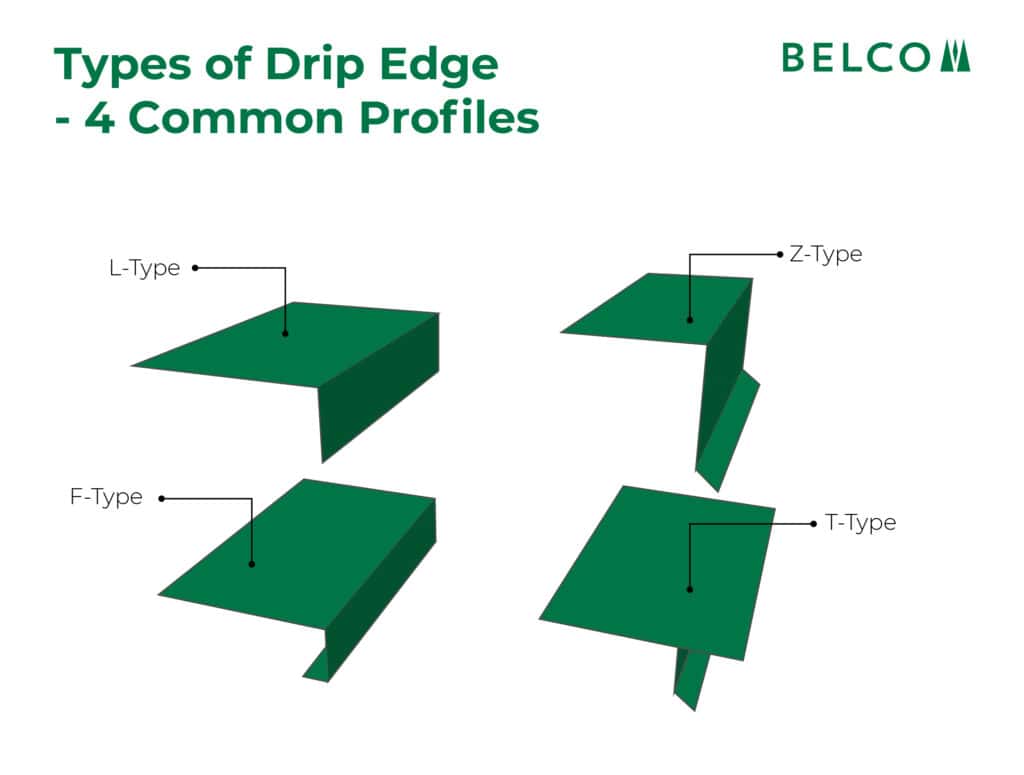
L-TYPE DRIP EDGE (Basic)
The L-type drip edge is one of the most common profiles. It features a horizontal flange that goes over the roof deck and a vertical one that covers the fascia board. This design channels water away from the roof and prevents it from seeping into the underlying structure.
T-TYPE DRIP EDGE (Elevated Protection)
The T-type drip edge is similar to the L-type, but the additional flange extends under roofing material, adding even more protection creating a more water resistant seal.
F-TYPE DRIP EDGE (Windy Climate)
This drip edge is used in areas with high amounts of wind exposure. Also known as a gutter apron, the F-type drip edge features an extended flange that overlaps the roof deck and the fascia board. This elevates protection against wind-driven rain and helps prevent water from dripping behind the gutters.
Z-TYPE DRIP EDGE (Steep Roof Pitch)
The Z-type drip edge is named after its Z-shaped profile. It is commonly used in steep-slope roofs. The Z-shape design helps redirect water away from the fascia and onto the roof surface, ensuring effective drainage.
Drip Edge Installation
To optimize the lifespan of your roof, particularly in regions with significant rain or snowfall, factoring in the drip edge during the cost estimation of a shingle or metal roofing project is advisable. Unless it’s mandated by local construction code, some may opt to defer drip edge installation to save money. However, the savings are marginal compared to the protective benefits it provides over time.
Installing a new drip edge is straightforward during initial roof construction or total roof replacement. A contractor can attach the drip edge over the sheathing before laying down shingles or other surface materials. However, installing a drip edge on an already-finished roof is a slightly more intricate process. Contractors or DIY homeowners must first lift the lowermost row of shingles, fitting the drip edge’s leading edge to the roof’s surface. Next, it should be secured with roofing nails no less than every 12 inches. A second person may be necessary to pry and hold shingles during installation. Finally, overlapping drip edge pieces by an inch or so, and sealing any gaps with roofing cement is an important finishing step.
Roof Drip Edge Materials
Metal is the predominant material for roof drip edge due to its durability. Aluminum drip edge is lightweight and relatively inexpensive. While not as robust as other metals, it resists corrosion and is available in various colors with an enamel finish. Galvanized steel drip edge is comparable in cost to aluminum but offers enhanced resistance to strong winds. This makes them a more optimal choice in climates likely to experience severe weather outbreaks. Finally, the most expensive metal drip edge material option is copper. Despite the cost, copper is highly durable and creates a distinct design aesthetic. Non-metallic options are also available, but are most commonly used for windows and doors.
Drip edge styles and material choice will have an aesthetic impact as well. One may opt for the striking style statement of copper drip edge, particularly on older architectural designs. Others often choose to match or complement the color of their gutters and trim. Whatever the case, balancing form and function should be considered for each application.
Final Thoughts on Drip Edge Types, Styles, and Function
Drip edge serves the critical function of directing precipitation away from the roof’s edges and into the gutter, preventing water pooling on the roof or running down the fascia boards. While Belco XT® Trim and Fascia products come standard with eco-friendly preservative and prime treatments to ward against decay, any process that ensures long lasting construction is a win in our book. The benefit of drip edges safeguarding against water damage, pest infestations, and the growth of mold and moss are substantial. This investment prolongs the life of any roof, particularly in regions with substantial precipitation.